How to Read a Trekking Map: Essential Navigation for Hikers
GPS technology has transformed trail navigation, but the ability to read a topographic map remains the most reliable navigation skill a hiker can possess. Maps don’t run out of battery, lose signal, or fail in extreme cold. This guide takes you from map-reading novice to confident trail navigator.
Key Takeaways
Topographic map reading remains the most reliable navigation skill because maps never lose battery or signal; the essentials are contour lines, map scale, and using a baseplate compass for triangulation.
- Scale: on a 1:25,000 map, 1 cm equals 250 m on the ground.
- Contours: contour lines reveal terrain shape, steepness and features.
- Compass: a baseplate compass weighs 30 g, costs about $15, and never loses signal.
- Positioning: use feature matching, triangulation (resection) and terrain following to locate yourself.
- Reassess rule: if an expected feature has not appeared after 20 minutes, stop and recheck.
Understanding Topographic Maps
Pros
- Topographic maps work without battery or signal
- Contour reading builds spatial terrain awareness
- Compass + map = reliable backup to GPS
- Physical maps cover entire regions at a glance
- Waterproof map cases cost under $15
- Map-reading skill makes any route navigable
Cons
- Learning curve: contour reading takes practice
- Requires knowing your starting position
- Map updates lag behind trail changes (check edition year)
- Folding and unfolding in wind is frustrating
A topographic (topo) map represents three-dimensional terrain on a two-dimensional surface using contour lines — lines connecting points of equal elevation. Understanding contour lines unlocks the map’s full meaning.
Contour Lines: The Language of Terrain
- Contour interval: The elevation difference between adjacent lines (usually 10m or 20m — check the map legend)
- Closely spaced lines: Steep terrain — the closer together, the steeper the slope
- Widely spaced lines: Gentle gradient — easy walking terrain
- Index contours: Every 5th line is darker and labeled with elevation
- Closed circles: Hilltops or depressions (check for tick marks pointing inward = depression)
- V-shapes pointing uphill: Valleys and stream courses
- V-shapes pointing downhill: Ridgelines and spurs
Map Scale: Understanding Distance
Get Your Free 12-Week Training Plan
Join 2,500+ Nordic walkers. Receive a proven training program PDF and weekly technique tips — free.
Scale is shown as a ratio (1:25,000) or graphic bar. A 1:25,000 scale means 1cm on map = 25,000 cm (250m) on ground. For trekking, standard scales are:
- 1:25,000: High detail, ideal for technical terrain and route finding
- 1:50,000: Good balance of detail and area coverage — most popular for trekking
- 1:100,000: Area overview, planning only — insufficient for navigation
Map Symbols and Colors
| Color | Represents |
|---|---|
| Blue | Water: rivers, lakes, springs, marshes |
| Green | Vegetation: forests, orchards, scrub |
| Brown | Contour lines, earth features |
| Black | Man-made features: trails, buildings, roads |
| Red | Major roads, boundaries, magnetic north markings |
| White | Open terrain, clearings |
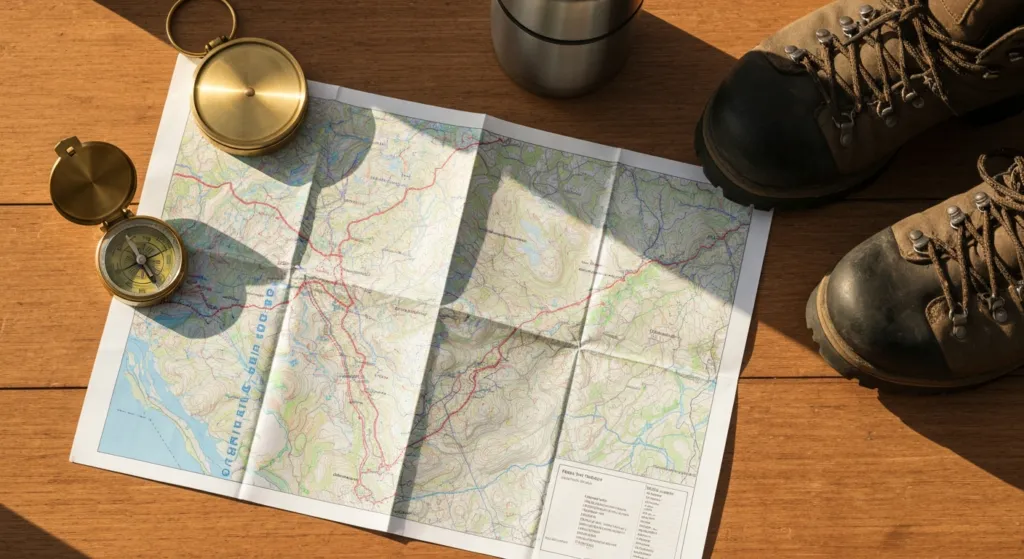
Using a Compass with Your Map
A baseplate compass used with a map provides reliable navigation without technology. The key skill is taking a bearing:
- Place the compass edge along your intended line of travel on the map, pointing from your position toward your destination
- Rotate the compass housing until the orienting lines align with the north lines on the map
- Turn your whole body (holding compass level) until the red magnetic needle aligns with the orienting arrow in the housing
- Walk in the direction of the travel arrow — this is your bearing
Declination: Magnetic north and true north (map north) differ by a small angle that varies by location. Check your map for the current declination and adjust your compass accordingly. In most of Europe, declination is 1–3 degrees east — negligible for most hiking but critical for precision navigation.
Locating Yourself on the Map
Three techniques for finding your position:
1. Feature Matching (Dead Reckoning)
Match visible landscape features (hilltops, valleys, streams, buildings) with their representations on the map. This is the most common and natural method on well-featured terrain.
2. Triangulation (Resection)
Take compass bearings to two or three identifiable features visible on both map and ground. Draw lines along these bearings from each feature on the map. Where they intersect is your position.
3. Following Terrain
Track your route continuously from a known start point by noting significant terrain changes (climbing, descending, crossing streams) and matching them to the map as you walk.
GPS as a Supplement, Not a Replacement
Modern GPS apps (Gaia GPS, Maps.me, OS Maps, Komoot) provide outstanding navigation support. Download maps offline before your trek — mobile signal is unreliable on trails. Use GPS to confirm your map-reading, not to replace the skill. Battery can fail; waterproofing is imperfect; screens crack.
Navigation Errors to Avoid
- Wishful thinking: Assuming the terrain matches your expectation rather than checking the map. Always verify, especially at junctions
- Compass near metal: Keep compass away from trekking poles, phones, and large metal objects when taking readings
- Not setting waypoints: Mark your trailhead on GPS before leaving the car park
- Walking in fog without compass: Without visual references, bearing walking is the only reliable navigation method
Map reading is a skill that builds confidence the more you practice it. Start by navigating familiar terrain without relying on GPS, gradually building to more complex route finding. The map will never let you down if you learn to trust and read it correctly.
Explore More
Related tools: Pace Calculator
Recommended reading: Multi-Day Trekking Gear | Top 5 Trekking Routes
Learn to read contour lines by finding a local hill you know and comparing it to the map. Identify the summit, saddles, and valleys on the map first, then walk the terrain. This ground-truthing approach builds map-terrain intuition faster than any classroom exercise.
Shop Navigation Gear on Amazon →
Essential Navigation Gear
Garmin inReach Mini 2 — GPS + Emergency SOS →
Suunto MC-2 Compass — Precision Navigation →
Garmin GPSMAP 67 — Handheld GPS →
National Geographic Trail Maps →
📚 See also:
- bushcraft and wilderness survival — Bushcraft Skills Guide
Digital Navigation vs. Paper Maps: The Right Approach
Modern GPS apps (Gaia GPS, AllTrails, OS Maps) are powerful tools, but experienced navigators use them as supplements to paper maps, not replacements. The reasons are practical: phone batteries die, screens are unreadable in direct sunlight, GPS signal fails in deep valleys, and a wet phone in a cheap case stops working. Paper maps have none of these failure modes.
The optimal system for any serious trek: download the relevant map in a GPS app for quick location checks, carry the corresponding paper topographic map in a waterproof case for navigation, and know how to use both. The GPS app tells you where you are; the paper map tells you what the terrain ahead looks like.
Practical Navigation: The 5-Minute Orientation Habit
At every trail junction and every viewpoint, stop for 30 seconds to orient your map to the terrain. Hold the map with North pointing to magnetic north (use your compass), identify two or three visible landmarks, and confirm they are in the correct relative positions on the map. This habit takes 30 seconds and prevents the “I thought I was further along” navigation drift that causes most trail confusion.
Learn to navigate by timing and pacing on flat terrain: if the map shows 1km to the next junction at 1:25,000 scale, and you walk at approximately 4.5 km/h on flat terrain, that junction should appear in about 13 minutes. If it has not appeared after 20 minutes, stop and reassess rather than continuing on assumption.
Frequently Asked Questions
Do I need a compass if my phone has GPS?
Yes. Phone GPS fails in three common scenarios: dead battery, no signal in deep valleys, and screen glare in bright sunlight. A baseplate compass weighs 30g, costs $15, and never loses signal. Carry it and know how to use it — you only need it on the day your phone fails.
How do I read contour lines on a topographic map?
Closely spaced contour lines = steep terrain. Widely spaced lines = gentle terrain. Circular contours indicate a hill summit (if the innermost is higher) or a depression (if it has tick marks). A V-shape pointing uphill indicates a valley or stream. A V-shape pointing downhill indicates a ridge.
What should I do if I get lost on a trail?
Stop and do not panic. Find your last confirmed location on the map. Identify visible landmarks (peaks, rivers, distinctive terrain features) and match them to the map. If you cannot orient yourself, follow water downstream — it leads to valleys and eventually to roads. Never leave the trail to take shortcuts through dense forest.