The Biomechanics of a Perfect Step: Nordic Walking Technique Guide

Most people approach Nordic walking as modified hiking — same mechanics, just with poles. This misses the point entirely. Nordic walking has a specific biomechanical signature that differentiates it from hiking, trekking, and regular walking. Understanding the gait cycle and how poles alter it is the difference between a 45-calorie-per-km workout and a 90-calorie-per-km full-body cardiovascular event.
It is also the difference between pain-free training for decades and developing overuse injuries that force you to stop. Let’s break down the mechanics with clinical precision.
Key Takeaways
Correct Nordic walking technique nearly doubles the workout, turning a 45-calorie-per-km walk into a 90-calorie-per-km full-body cardiovascular event, driven by a precise four-phase gait cycle.
- Caloric difference: proper technique lifts output from about 45 to 90 calories per km.
- Pole plant: the opposite-side pole lands 30 to 45 cm in front of the foot, not beside it.
- Load sharing: during weight transfer the pole absorbs 15 to 20% of body weight through the arm.
- Common error: stopping the push at a 90-degree elbow loses 40 to 50% of the upper-body calorie benefit.
- Footwear: shoes with over 8 mm heel drop tilt the pelvis and disrupt the gait.
The Nordic Walking Gait Cycle: Phase by Phase
The walking gait cycle has two main phases: stance (foot on ground, approximately 62% of cycle) and swing (foot in air, approximately 38%). Nordic walking modifies both phases through the pole contact arc. Understanding where each phase begins and ends lets you identify and correct specific errors.
Phase 1: Initial Contact (Heel Strike)
The foot contacts the ground at the heel (or midfoot for minimalist-trained walkers). Simultaneously, the opposite-side pole plants approximately 30–45cm in front of the foot — not beside it. The pole angle should be 70–75 degrees from horizontal. A steeper pole (more vertical) creates a braking force; a flatter pole (more horizontal) creates a forward propulsive force. The propulsive plant is the target.
Critical checkpoint: at initial contact, your torso should be upright (5–8 degrees forward lean from vertical), not hunched. Hunching shifts the center of mass ahead of the base of support and eliminates the postural alignment benefit that makes Nordic walking superior for lumbar spine health.
Phase 2: Loading Response (Weight Transfer)
As full weight transfers to the stance leg, the pole absorbs 15–20% of body weight through the arm — this is the joint decompression mechanism. The wrist should be in neutral position (not dorsiflexed), with push force distributed across the palm via the trigger strap rather than through finger grip. This is why proper strap technique is non-negotiable for joint protection.
Phase 3: Mid-Stance and Push-Off
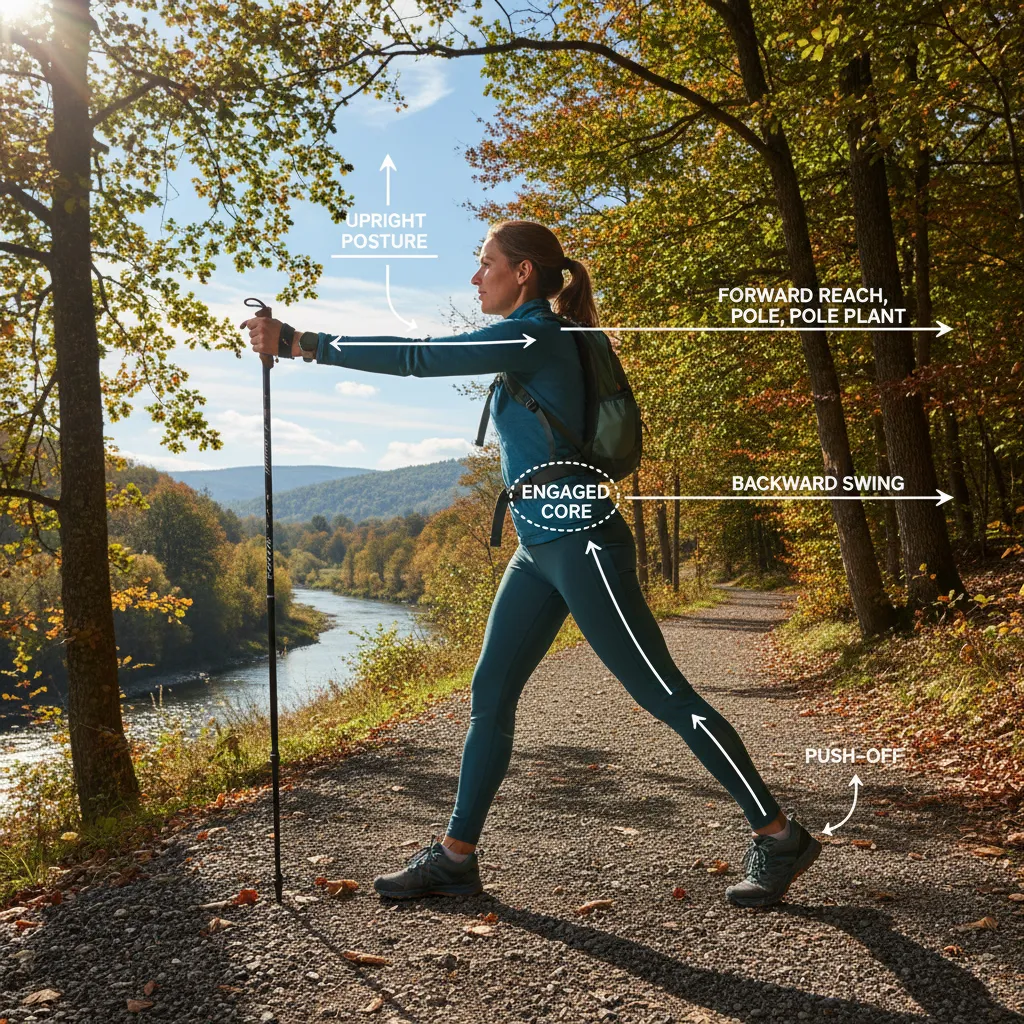
Mid-stance is where Nordic walking diverges most from regular walking. As the body passes over the planted foot, the pole drives backward — the push phase. The elbow extends, the triceps contract concentrically, and the shoulder externally rotates. This triceps push activates the upper body musculature that regular walking completely misses.
The push continues until the arm extends fully behind the body — the pole tip releases from the ground. Many beginners terminate the push at 90 degree elbow angle, losing 40–50% of the upper body caloric benefit. Full arm extension behind the hip is the technical gold standard.
Phase 4: Swing Phase
After pole release, the arm swings forward naturally. The hand should open (not grip the handle during swing) — the trigger strap carries the pole through the swing phase passively. Re-gripping during swing is a common error that creates muscular tension in the forearm and prevents proper proprioceptive loading in the next cycle.
The 6 Technique Errors That Cause Pain
Get Your Free 12-Week Training Plan
Join 2,500+ Nordic walkers. Receive a proven training program PDF and weekly technique tips — free.
Pros
- Activates 90% of skeletal muscles
- Reduces spinal compression vs running
- Improves posture through diagonal loading
- Burns 20-46% more calories than walking
- Suitable for all fitness levels
- Accessible on any terrain
Cons
- Takes 4-8 sessions to master correct technique
- Poles add gear to carry and store
- Learning curve can frustrate beginners
- Incorrect technique can cause wrist/shoulder strain
- Not practical in very crowded urban areas
Through gait analysis of hundreds of Nordic walkers, six errors account for the majority of technique-related injuries and performance losses.
| Error | Consequence | Fix |
|---|---|---|
| Poles planted beside foot (vertical) | No upper body engagement, no joint decompression | Plant 30–45cm ahead of foot at 70-75 degrees |
| Gripping handle during swing | Medial epicondylitis (golfer’s elbow) | Open hand during swing, use strap only |
| Short arm push (elbow over 90 degrees) | 40–50% calorie loss, no upper body benefit | Full extension behind hip |
| Forward trunk lean over 15 degrees | Lower back pain, reduced stride length | 5–8 degrees maximum lean |
| No heel-to-toe foot roll | Calf tightness, plantar fasciitis risk | Conscious heel-midfoot-toe sequence |
| Shoulder elevation | Neck and shoulder tension and pain | Actively depress shoulders each stride |
Film yourself from behind and the side during a 10-minute Nordic walk. Watch specifically for shoulder elevation (most common error) and pole angle. Most people correct 3–4 errors in the first session of self-review that 6 months of unmonitored practice failed to address.
Footwear Biomechanics for Nordic Walking
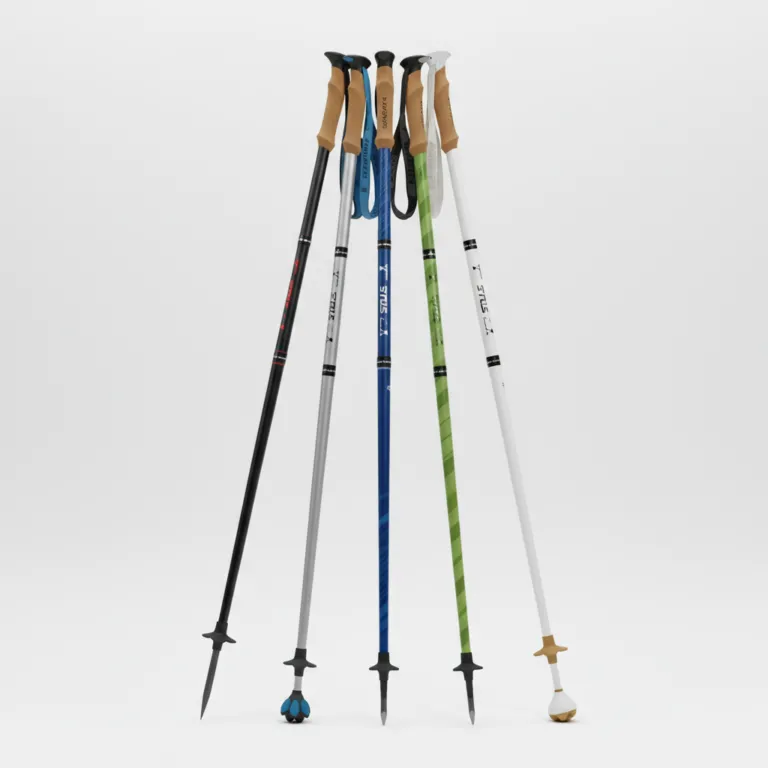
The right poles reinforce correct technique and prevent compensatory movement patterns. See our 2026 pole comparison to match hardware to your gait needs.

Footwear selection has a cascading effect on every phase of the gait cycle. Traditional running shoes with elevated heel counters (drop over 8mm) artificially tilt the pelvis forward during Nordic walking — forcing compensatory forward trunk lean and reducing effectiveness of the pole propulsion phase.
Zero-drop or low-drop footwear (4mm or less) allows the natural postural alignment that Nordic walking demands. Vivobarefoot and Merrell Vapor Glove are the most extensively tested options in this category. See also our Joint Health Comparison for more on footwear impact.
Check Vivobarefoot Primus on Amazon Check Merrell Vapor Glove on AmazonProgressing Your Technique: A 4-Week Protocol
Technique improvements require deliberate, isolated practice before integration. Do not try to fix all six errors simultaneously.
- Week 1: Focus solely on pole angle — plant ahead of the foot, not beside it. Walk 5 minutes, pause and consciously check, walk 5 more.
- Week 2: Add full arm extension. Count each stride where your arm reaches full extension behind your hip. Target 100% compliance by session 4.
- Week 3: Add open-hand swing. Practice grip-release-grip rhythm: hold during plant, open during swing, close at next contact.
- Week 4: Integrate shoulder depression. Set a phone timer to beep every 90 seconds — at each beep, consciously check and lower your shoulders.
After 4 weeks, you will have internalized the movement pattern. Use our Calorie Calculator to verify improved technique efficiency — correctly executed Nordic walking burns 35–46% more than regular walking at the same speed.
Technique Drills: 5-Minute Daily Practice That Transforms Your Gait
Elite Nordic walkers do not achieve technique through longer sessions — they achieve it through short, focused drills performed consistently. Five minutes of deliberate drill work before each session outperforms 60 minutes of unaware technique practice. Here are the four drills used in GaitLab-certified coaching programs.
Drill 1: The Pole Drag (3 minutes). Walk without straps, dragging the poles behind you with the tips on the ground. This isolates the push phase — you feel exactly when your arm falls behind your hip and when the push terminates. Most beginners discover they stop pushing 30–40cm too early. Correct the push to full arm extension, and you will feel the lat and tricep engage for the first time.
Drill 2: Exaggerated Arm Swing (1 minute). Walk with poles but swing your arms dramatically — hands reaching shoulder height in front, full extension behind. This breaks the shortened-swing habit most beginners develop. After 60 seconds of exaggerated swing, return to normal walking and your natural range increases noticeably.
Drill 3: Single-Pole Walk (1 minute each side). Walk with only one pole on the right side for 60 seconds, then left only. This reveals lateral asymmetries in your technique — most people push harder on their dominant side. Identifying this asymmetry is the first step to correcting it.
Film yourself from the side at 50% of normal walking speed using slow-motion video on your phone. Most technique errors are invisible at full speed. Slow-motion reveals pole plant angle, heel strike position, and arm extension with clarity that real-time observation cannot provide.
The 4-Week Technique Progression
Do not attempt to correct all six technique errors simultaneously — the motor learning research is clear that focusing on more than two movement variables at once inhibits skill acquisition. The GaitLab 4-week progression addresses the highest-impact errors first:
- Week 1: Pole plant angle (forward at 70–75 degrees) and heel-to-toe weight transfer
- Week 2: Full arm extension on push phase (complete the push past the hip)
- Week 3: Strap engagement — push through strap, open hand at full extension
- Week 4: Rhythm consolidation — smooth 100–120 step/minute cadence with all elements integrated
After 4 weeks of this progression, most walkers report their Nordic walking feeling qualitatively different — lighter, more propulsive, and less effortful at the same speed. This is the neuromotor signature of automatic skill acquisition: the cortex hands control to the cerebellum and the movement becomes subconscious.
Frequently Asked Questions
Why does my back hurt when Nordic walking?
The most common cause is excessive forward trunk lean (over 12 degrees) combined with poles that are too long. Long poles force you to reach upward rather than planting at a propulsive angle, creating lumbar extension and SI joint stress. Shorten poles by 3–5cm and consciously maintain upright posture. If pain persists, check for anterior pelvic tilt and add hip flexor stretching to your warm-up.
What is the correct arm swing in Nordic walking?
Opposite arm to opposite leg — exactly as in natural walking. The arm should swing from the shoulder joint (not just the elbow), sweeping from approximately 30 degrees forward to full extension behind the hip. The elbow angle during forward swing should be approximately 90 degrees, relaxing to 160–180 degrees during the push phase.
How far ahead should I plant my poles?
30–45cm ahead of the same-side foot is the target range for flat terrain. On uphill, reduce to 20–30cm to maintain propulsive angle. On downhill, plant beside or slightly behind the foot to provide braking support.
Should I look down when Nordic walking?
No. Gaze should be forward and level — 10–15 meters ahead on flat terrain. Looking down forces cervical flexion, loading the posterior neck muscles isometrically and creating the text neck posture you are specifically trying to counteract with Nordic walking.